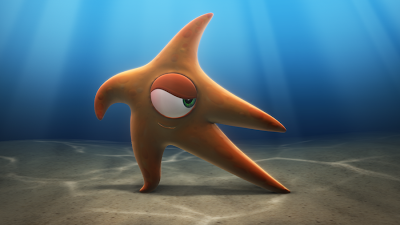
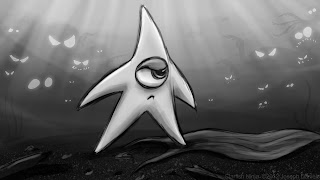
Watch the teaser trailer HERE!

Monday, September 3, 2012

Done by Hand

In this post, I will showcase some of the neat effects that are done "by hand." Now, the term "by hand" is not really a great one to use in CG animation because ALL of the artwork is created by the hands of artists. The computer, as great as it is, doesn't do much of the work for us.  It would be kind of like saying that an individual car could be credited with the success of a race. The car is certainly a factor, but maximizing the role of the machine is down right insulting to the humans involved.  Right?

What I mean here in saying "by hand" is that an effect that you might think is created by a complicated simulation or algorithm that is instead created frame by frame by an artist. Why?  Because sometimes its FASTER.  Her are a few examples:

Octopus Decloaking:
In the SFN Teaser, there are two quick shots showing the stealthy ninja assassin octopi that stalk our hero. Real world octopi have an incredible ability to adjust the pigment of their skin to blend into their surroundings.  Maybe you've seen this clip:


In the world of my story, octopi are caricatured to be able to cloak and de-cloak as they move about, making them the perfect hired assassin or great for reconnaissance.

Instead of generating this effect with complex networks of animated procedural textures, I chose the low-fi route, and gained heaps of artistic control. I simply painted an animated alpha channel (an image that controls the opacity of a surface). Frame by frame, one frame after another, each successive image reveals more of the character than the last.

For this I used the open source software package Blender for its projection painting ability, which at the time I did it was new to Blender.  Why Blender?  We'll get to that in another post.

(The left image below shows alpha channel image sequence as it appears on the model, the right is the result that this has on the transparency of the model when rendered.)


My process was this: I started off with a black (transparent) texture over the model and saved it out as the first frame. Then I painted a little white along the edge of the eye, and saved it as frame two. As I went along, I would paint the suction cups to appear one by one, and veins of white that appeared to spread and snake along the surface of the character, until the whole surface was white (opaque). I ended up painting about 50 separate images that, when put in a sequence, will animate to show the octopus build out with some artistic flare.

While this took me about two hours to do, it is an effect that could be then plugged into a slider for an animator to fade through as desired, and could be calculated in near real time in Maya, which is a big deal. If I had used other methods it would take much longer to render, and time is money.

Final Shot Squid Arm Particles:
An effects artist named Jenna Kind helped generate and simulate particles for the collision between the squids long tentacled arm and the ground in the final shot of the teaser. In the composite, the particles were brought down in strength so they don't distract from the characters in such a short shot. But if you look close, you'll see a few cloudy wisps of sand that move out of the way as the arm crashes down. I was happy with the simulation, but it wasn't leading the eye in the way I wanted. So instead of spending hours or days tweaking the simulation to get the exact graphic shapes I wanted, I decided to spend about half an hour painting over a handful of frames in the sequence by hand.

Original Render


Particle Paintover in PS

Note the difference in the way your eye flows through the frame in the second version. To do this I used one of my favorite features from recent versions of Photoshop - the ability to work with video. I often hear this feature criticized, but for quick touchup work I think it's the best thing since sliced cranberry sauce from a can.  Give it a try!

CG Smears:
One of my favorite tumblr sites is the smears and multiples blog. A smear in animation is a frame or frames in which the artist chooses to distort proportions of a character or object to aid the audience in following a quick arc or movement that has been caricatured to where it would be hard to follow otherwise. It's a stylistic choice used to provide clarity.

With the technology we used to render the teaser, motion blur had to be cheated or in most cases left out completely. Motion blur can help the flow of movement in animation, but without it I was excited to draw from some of the fantastic cheats that we're developed with hand drawn animation. (As a side note, smears are present not only in the very stylized works of Tex Avery and Chuck Jones, but are also peppered judiciously through the hand drawn Disney films, as well as the modern works of Disney, Pixar, Dreamworks, Blue Sky, and the like.  I even found an example of it in ParaNorman.)
A sequence of smears, slowed down to 50% speed.
To create the smears in SFN, I found it fastest in most cases to complete a shot entirely and then take the final sequence into Photoshop to paint over the couple of frames that needed to be tweaked. By bringing in the entire sequence of video instead of looking at the frames individually, it was easier to see the effect in context.

Here are some of my favorites.  The last two are subtle, but they make a real difference if you see it with and without:


Breaking the Surface:
Two weeks ago, we looked at a shot where the camera breaks the surface and submerges.  This was an interesting challenge for lighting, but also for compositing the elements of the shot together.  Below we will look at the composite created by Curtis Cheung, as well as the paint-over tweaks I did on top to help the transition to the underwater setting.

If you're not used to looking at animation and picking apart details, the following .gifs may look identical.  On first look, hopefully you will notice that the camera in the top sequence feels like it suddenly "pops" beneath the surface, where the transition in the second should feel softer and more natural.

Original Comp by Curtis Cheung


Photoshop paint-over to ease transition
 There are a few things that I took into consideration in making the tweaks to this shot.  The primary issue that makes it feel "poppy" is explored in the images below.  On frame 28, the darkest and highest contrast is in the upper half of the frame.  On frame 29, this inverts, and the bottom becomes significantly darker.  When images are too dissimilar from one frame to another, they will appear to stutter or pop.


The other key thing I wanted was to see the adhesion of the water on the lens of the camera, and it really didn't come out in the render.  I looked at a lot of photography taken by half-submerged cameras, and I really wanted to feel the water sticking to the lens.

If you compare those images, you'll see that there is something adjusted in all three frames on the final sequence, but most of it is in frame 28.  In animation, the difference between a "pop" and a "slurp" may be as simple as one frame out of the 24 or 30 frames we see each second.  Every frame counts, and in this shot, frame 28 was worth some extra effort.

Well, that wraps up my post for this week.  I have more behind the scenes topics, most of which are less technical that the last couple have been, but I hope you're finding these interesting.

Leave a comment, subscribe at the top of the page, and pass this along to anyone you think might be interested.  Spread the word, the ninja is coming!


Monday, August 27, 2012

"Realtime" Rendering with Viewport 2.0


The day is finally here!  In this week's post I will be explaining some of the secrets to how we knocked render times from minutes per frame down to mere seconds.  This is not a step-by-step, but it will be slightly technical, so with an intermediate level of knowledge, you should be able to follow the concepts.  If you have yet to watch the teaser for Starfish Ninja, check it out, then come right back :)

I'll begin with this statement:

Anything can be used to make something.


By this I mean that sometimes a great solution can come from a unexpected tool - something that is perhaps meant for a completely different task. So when you're looking for a solution to a difficult problem, try thinking of how you might "misuse" every tool you know to get the job done. Try it.

I realize that I'm weird. When I hear about some new technology, my first thought is about how I might use it to do something completely different with it. So I was instantly excited when I heard that Maya 2012 would have a new viewport shading algorithm that would support anti-aliasing and screen-space ao.  I tossed my head back and giggled like a school girl. "I'm done rendering forever!" I shouted, despite the odd looks from my wife.

Then when I finally got to play with the feature, I immediately ran into some of the drawbacks of this early tech.  It's certainly not feature complete, and not without flaws - as we will explore below.  And this is where most people just turn VP2.0 off and shake their fists at Autodesk. Fools, they are, I say!  While this is not a replacement for Mental Ray or Renderman by any means, when you compare quality of output to render time, the techniques we developed on Starfish Ninja should sound appetizing to smaller non photo real productions, or perhaps simply for animators who don't need to spend days rendering and comping their animation tests.  It's my hope that more rendering technologies begin to move in the realtime direction--that this is only the beginning of a new direction for the output of art in our industry.  Let's dive in.

I discovered that if you render a bunch of passes as render layers, you can overcome many of the drawbacks (which i will cover later) and get a single pass such as ambient occlusion to spit out at 2 to 4 fps.  We were also able to use cgfx shaders similar to game engine shaders to cheat things like rim lighting and depth passes at incredibly high frame rates, all at full HD.

-displayed at 50fps on a modest workstation
Now instantly the critics out there will say, "Wait, that's ssao which is not accurate." Yes, I am aware. I am also aware that starfish do not talk, and do not know the ways of the ninja. So there. Ha.

I'm looking for a graphic style, not a photocopy of reality. So I want my artists to spend time pushing, pulling, shifting, and otherwise redirecting the imagery instead of paying huge overhead for a render farm.  If you control the effect and build it into the style and visual vocabulary of the show, it will work, in most cases.

And now with technologies like Source Filmmaker out there, and even just improvements to Maya's VP2.0 in 2013, artists have more potential tools to get the job done cheaply than ever before.  Another bit of software I'm very excited to get time to play with is the Furryball render plugin for Maya. Here you'll see the best of not only VP2.0 but also UTE and CryEngine taken to the extreme, and ready for tv production. Take a look at the features in the latest release. Realtime, in viewport indirect lighting and cheated radiosity. Realtime reflection and refraction. Not to mention particle and fluid effects.  With all the R&D that has been happening in the game industry, it's a shame that more film studios aren't riding in the wake of game development for GPU processed subdivision and displacement, at least for non photorealistic production.  (After drafting this up, a friend pointed me to this article, as an example of some smart thinking, imho.)

But I digress, what I would like to do next is break down the workflow we hacked together in Maya's VP2.0 so you can reap similar benefits, if it makes sense for you. If you've seen the teaser for my project Starfish Ninja, you've seen VP2.0 in action in every single frame.

What you see here is a test composite that was developed to break compositors into our workflow.  Everything you see here, with the exception of the godrays streaming in from the top comes from either a hardware 1.0 or hardware 2.0 (viewport 2.0) pass from Maya, both of which are just glorified playblasts.

Test Composite - for training purposes

The final look is a product of the combination of about a dozen images that each contain a specific lighting or compositing pass.  As seen below, the lighter can preview the composite of all the passes to make tweaks before handing it off to be put together (in our case in Nuke or After Effects).


To get passes such as depth and automated rim lighting, we made use of a few CGFX shaders developed for game purposes.  With a budget to write shaders, I'm sure we could have made a more efficient water shader, though reflection maps and some compositing cheats got us through the variety of shots in the teaser.

That covers most of what is worth going over here.  Keep reading if you want to see how we used it in more detail, and we'll conclude with a summary of pros and cons.

Below are some screen caps from another shot from the teaser.  These are the main passes needed to composite the shot, although some others were left out for the purposes of this discussion.  I've left the heads up display on to emphasize that this is what you see in viewport.  Click to see larger:


 For Ambient Occlusion in Maya 2012, we found there were some problems with grainy artifacts.  Since this was what was available for the project, we found that if we applied a median filter and slightly blurred the occlusion in post we could achieve acceptable results.  Below is first the version with artifacts, then without.

 Below we compare a quick composite before the AO, and after.


And here is an enlargement of some of the problems you have with filtering the AO that has artifacts.  Most of these issues were able to be tweaked and massaged out of the final composites, given a little extra time.  Keep in mind, though, that everything you see in the teaser is generated in near real time, as opposed to rendering for hours.  So we can afford to tweak a bit by hand.

Maya 2012 artifacting - fixed in 2013

**The good news is that Autodesk has fixed the problems with the AO in Maya 2013, so the images below show what AO looks like on our octopus model, artifact free!  To set up a shader for an AO pass, on a new render layer, we assign a layer override with a white lambert with white ambient color.  Turn on the AO in the viewport 2.0 settings (assign a layer override for this so it's not on the other render layers).  The radius and filtering settings can be tweaked to get the right amount of falloff.

Tight AO Pass - to capture fine detail
Broad AO Pass - to get larger shading
2 AO Passes - multiplied together for final result


So let's end with a comparison of the benefits and down sides:


The Pros:


  • What you see in the viewport is what renders.
  • Very short render times:  4 sec/1080p frame for all passes.  Each shot can then be rendered on an individual machine in minutes, not hours or days.
  • Ambient Occlusion that renders in realtime
  • Anti Aliasing - up to 16 samples
  • Depth of Field - better done in AE or Nuke
  • Motion Blur - it's crappy, but yes


The Cons:

  • Limited anti-aliasing.  More than 16 samples would be great in many cases.
  • Hardware 2.0 does not support particles or animated textures, though Hardware 1.0 does to an extent.
  • No raytracing (reflection maps can be used, soft depth map shadows can be used)
  • No displacement (though this may be resolved in the future)
  • Limited to 1920 x 1080 maximum resolution (perfect for tv, though)
  • No light linking or negative lights, and a limit of 16 lights per pass.  This is the main reason that so many passes must be output.

I hope you found this interesting.  Next week, we'll look at some neat effects from the teaser that were created frame by frame, by hand.  Why?  Tune in next week to find out!


Wednesday, August 22, 2012

Practical FX of SFN

Practical Film Shoot - Berardo (the bubble blower) is off screen

One important aspect of selling the underwater world to an audience is silt particles that drift in the current. In the teaser, quite a bit of the silt and sand is CG. But some of the shots where there are impacts with the sand or where very specific movements were needed in the sand particles or bubbles, we chose to shoot video footage to composite with the animation.


In a lot of cases, practical effects (effects shot in camera, not computer generated) are faster and therefore cheaper to create. For instance, the crab claw impact particles in the image above took the effects artist a couple days to get just right.  The sea urchin impact on the right uses a number of practical sand poofs that took maybe an hour to set up and do a host of takes, using a $10 fish tank and 5 bucks of sand.

For a lot of shots the CG simulation is necessary.  That crab claw impact needed to have particles that interract with the ground and character, and need to pull up with the claw as it lifts out of the sandy bottom.  So we chose key shots that needed the extra love and gave them the time they needed for proper simulation.

With some shots, as in the one below, it was more efficient to composite practical bubbles over the final render.  Note that in most shots a combination of the two are used, as in the cg silt particles in the background.


In the end, the goal is that the viewer doesn't notice the technique being used and it is all just a harmonious part of the visual experience...and we get the shot done on time.

Here is a short breakdown of a few uses we had for the footage.  There's no sound, so that's why you hear nothing ;)  Feel free to make your own sound effects:


Stay tuned:

Next week we'll go over some exciting uses of unusual techniques that dropped the render times from 5 minutes per frame to only a couple of seconds. Sound too good to be true?
Find out next week!


Friday, July 20, 2012

The Big Question

Why must I tell this story?

Like many of us, I gobble up stories about heroes.  They’re delicious to my soul.  It’s inspiring to jump into the shoes of someone who struggles, yet ultimately achieves great things.  These beautiful stories provide hope that there is good in the world and that we can be a part of it.  In my opinion this is art at its highest form, and it is why you cannot depreciate the value of art. However I have a hard time relating to powerful heroes who have it too easy, or who seem to automatically fight for the greater good.


In my personal life, I find that sometimes it’s a struggle to balance all my responsibilities -- especially the tasks I didn’t ask for and feel ill-equipped to triumph over.  I find that often the decision to do what is right comes at the cost of something I truly want.  And I’m not ok with succeeding spectacularly in a few areas while neglecting or failing in ways that hurt others.  We can’t often choose all that is on our plate, right?  That’s life.


To me a real hero is a mother or father who slaves away at a job they hate, doing the best they can for their family.  Each day they decide to get up and do what is right for the ones they love.  They choose to put aside their own needs or dreams to do what is right.  Is it easy?  Does it come naturally?  Hell no!  But it is a possibility we all have inside.


To me, a hero is the son or daughter that spends quality time connecting with his or her grandparent who is fading away in a nursing home, when everyone else is too busy or uncomfortable to visit.  The heroes I respect are not those who are instinctually motivated to do good, but those who do what they must when everything inside says, “Run!"

The hero in my story becomes this kind of character, and he has helped motivate me as he struggles and questions and bleeds.  And I don’t think you’ll find it preachy, hokey, or fake.  It is an action story a story of action, of the actions of a small, weak creature that grows to be something more.  


That is why, despite the odds, I must tell this story, and why I know you will enjoy following the journey of a simple starfish with an impossible task.  Like the starfish I can't do it alone, so who’s with me?


Thanks for reading,
Joe

Tuesday, May 29, 2012

Questions about SFN


So I've received a number of questions about the teaser, and I'd like to take a few moments and answer some of those:

  • What is this project?
  • Is the starfish a military experiment?
  • Is this a campy love story in disguise?
  • Where does this project go from here?  What's next?

What is this project?
Starfish Ninja is a story I've been developing off and on since the spring of 2004 about a young starfish who is sent on a quest to save the world.  In parallel to writing the story, I boarded and began working on a teaser trailer--one that would reveal little about the storylines, but would serve to inspire the story and help define the tone and energy of SFN.

By late 2008 I had created the main characters, and bits of sets, and had even animated half a dozen or so of the 45 shots in the teaser.  In early 2009 I took a job teaching in the Animation and Visual Effects program at Ex'pression College in Emeryville.  Along with freelance side projects I continued to develop the idea in my spare time, but progress was much slower than I had hoped.  Ex'pression has a group project class where a director is brought in for a 5-week term to create their original short film or music video, and in late fall of 2011 I was invited to bring my teaser project to the school for the students to work on as part of this class.  In the end, more than 20 students were involved with the teaser project in various capacities as well as half a dozen professionals who donated their time. 

If the teaser left you wanting more...thanks!  I hope to give you much more as soon as possible.  I have a couple short animated scenes in progress now which are more about acting than action, and will post them online as soon as they are ready, so stay tuned!

Is the starfish a military experiment?
No.  Our hero does run into a certain military figure and his crew from time to time, but he was not created by them and is not affiliated with them at all.  The rules of the world of SFN are similar to Finding Nemo, with a little more fantasy and  a lot more action.

Is this just a front for a cheezy love story?  Will it turn out to be a campy family flic?  Animation is for kids, afterall.
Grrr. 

What is next?
Well, the next step for me is to roll out some more behind the scenes posts and artwork as I put together a Kickstarter to raise funds so I can begin pitching the idea.  I've put it online to get people excited, so if you like it, pass it on!

Hopefully this answers a few of your questions.  If you have more, leave a comment and I will try to respond promptly.

Cheers,
Joe

Monday, April 30, 2012

Trailer Desktop Bkg

Here's another desktop from the trailer.  I look forward to putting posts together in the future explaining a bit about the rendering, but briefly, I've hacked together a workflow using Maya 2012's Viewport 2.0 to render nearly all of the passes, resulting in full HD renders that take less than 10 seconds per frame (that's at an average of 10 render passes per shot).  In Mental Ray or similar renderer the time would be about 5 minutes per frame for the complexity we're working with.  There are certainly trade-offs, but here's the bottom line:

10 seconds/frame  vs.  5 minutes/frame

Which would you prefer?

Saturday, February 11, 2012

Voice Acting audition

We're having our first audition for voice actors on the show, which is really exciting.  I'm casting for the voice of the Starfish (main character) and his ninja master Sensei Onami, as well as a few other background characters, and will be meeting up in Emeryville tomorrow.

The Starfish Ninja - our main character is a young teenage male.  Though he's intense and tries to sound tough, he comes across spunky and endearing, almost cute.  He's a people watcher and a deep thinker when alone - which is most of the time, but around others he's quick to action and insecure.  He's a bit like Po from Kung Fu Panda in energy and passion for martial arts, but less goofy.


Master Onami - a wise, old asian master character with a strong yet humble voice and a "girly", but not scary, laugh.  Much like Mr. Miyagi or Yoda he is a warm friendly character. We're not quite sure if he is brilliant or clinically insane half of the time.  Emotionally if he's not acting over-the-top silly, he's flat and almost stoic.  His laid back attitude is a stark contrast to that of the starfish.


If I don't find what I'm looking for tomorrow, I will hold another audition at a later date, so if you're interested and feel that you can create something original for these characters, drop me a line!

josephsdaniels (at) gmail (dot) com

Sushi House desktop

Here's another still from the trailer.  Set model and textures by Claire Bussell.

1920 x 1080 Desktop Bkg -- right-click to save

early color key from 2007

That color key is one I whipped up 5 years ago this month, so this particular shot was quite enjoyable for me to see finished.

As a side note, some of my college buddies may notice that the design of the wooden platter on the left edge of the frame is based off the kind they have at California Rollin'.  Man, I miss that place...and their wasabi brew.

Sooo much more to share soon, so stay tuned and thanks for your patience!